8.4 KiB
Prerequisites
Proxmox Hypervisor
This tutorial is intended to be performed with a Proxmox hypervisor, but you can also use it with ESXi, KVM, Virtualbox or other hypervisor.
The compute resources required for this tutorial is 26GB of RAM and 100GB HDD (or SSD).
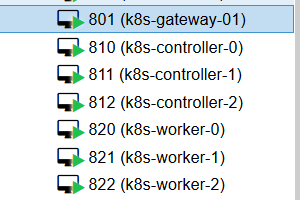
List of the VM used in this tutorial :
| Name | Role | vCPU | RAM | Storage (thin) | IP | OS |
|---|---|---|---|---|---|---|
| controller-0 | controller | 2 | 4GB | 40GB | 192.168.8.10/24 | Ubuntu |
| controller-1 | controller | 2 | 4GB | 40GB | 192.168.8.11/24 | Ubuntu |
| controller-2 | controller | 2 | 4GB | 40GB | 192.168.8.12/24 | Ubuntu |
| worker-0 | worker | 2 | 4GB | 40GB | 192.168.8.20/24 | Ubuntu |
| worker-1 | worker | 2 | 4GB | 40GB | 192.168.8.21/24 | Ubuntu |
| worker-2 | worker | 2 | 4GB | 40GB | 192.168.8.22/24 | Ubuntu |
| gateway-01 | Reverse Proxy, client tools, gateway | 2 | 4GB | 40GB | 192.168.8.22/24 | Debian |
On the Proxmox hypervisor, I just added the k8s- prefix in the VM names.
Prepare the environment
Hypervisor network
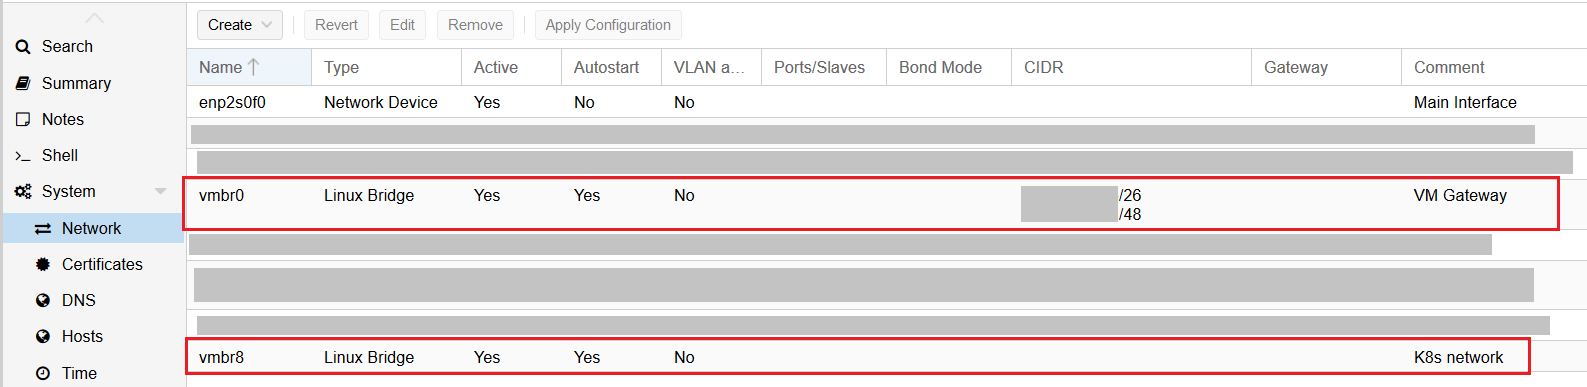
For this tutorial, you need 2 networks on your Proxmox hypervisor :
- a public network bridge (
vmbr0in the following screenshot). - a private Kubernetes network bridge (
vmbr8in the following screenshot).
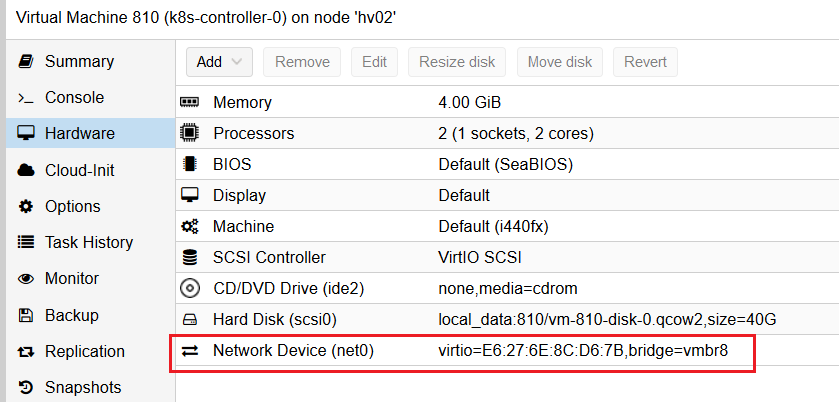
All the Kubernetes nodes (workers and controllers) only need one network interface linked to the private Kubernetes network (vmbr8).
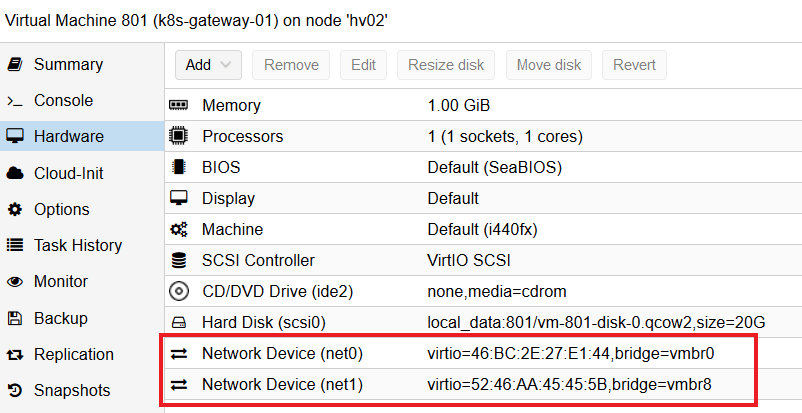
The reverse proxy / client tools / gateway VM need to have 2 network interfaces, one linked to the private Kubernetes network (vmbr8) and the other linked to the public network (vmbr0).
Network architecture
This diagram represents the network design:

If you want, you can define the configuration for the IPv6 stack.
Gateway VM installation
The basic VM installation process is not the purpose of this tutorial. Because it's just a tutorial, the IPv6 stack is not configured, but you can configure it if you want.
This VM is used as a NAT gateway for the private Kubernetes network, as a reverse proxy and as a client tools.
This means all the client steps like certificates generation will be done on this VM (in the next part of this tutorial).
You have to:
-
Install the latest amd64 Debian netinst image on this VM.
-
Configure the network interfaces (see the network architecture). Example of
/etc/network/interfacesfile if ens18 is your public interface and ens19 is your private interface (you need to replacePUBLIC_IP_ADDRESS,MASKandPUBLIC_IP_GATEWAYwith you values):
source /etc/network/interfaces.d/*

# The loopback network interface
auto lo
iface lo inet loopback

# The public network interface
auto ens18
allow-hotplug ens18
iface ens18 inet static
        address PUBLIC_IP_ADDRESS/MASK
        gateway PUBLIC_IP_GATEWAY
        dns-nameservers 9.9.9.9

# The private network interface
auto ens19
allow-hotplug ens19
iface ens19 inet static
        address 192.168.8.1/24
        dns-nameservers 9.9.9.9
If you want, you can define the configuration for the IPv6 stack.
- Define the VM hostname:
hostnamectl set-hostname gateway-01
- Update the packages list and update the system:
sudo apt-get update && sudo apt-get upgrade -y
- Install SSH, vim, tmux, NTP and iptables-persistent:
sudo apt-get install ssh vim tmux ntp iptables-persistent -y
- Enable and start the SSH and NTP services:
sudo systemctl enable ntp
sudo systemctl start ntp
sudo systemctl enable ssh
sudo systemctl start ssh
- Enable IP routing:
echo 'net.ipv4.ip_forward=1' >> /etc/sysctl.conf
echo '1' > /proc/sys/net/ipv4/ip_forward
If you want, you can define the configuration for the IPv6 stack.
- Configure the iptables firewall (allow some ports and configure NAT). Example of
/etc/iptables/rules.v4file if ens18 is your public interface and ens19 is your private interface:
# Generated by xtables-save v1.8.2 on Fri Jun  5 16:45:02 2020
*nat
-A POSTROUTING -o ens18 -j MASQUERADE
COMMIT

*filter
-A INPUT -i lo -j ACCEPT
# allow ssh, so that we do not lock ourselves
-A INPUT -i ens18 -p tcp -m tcp --dport 22 -j ACCEPT
-A INPUT -i ens18 -p tcp -m tcp --dport 80 -j ACCEPT
-A INPUT -i ens18 -p tcp -m tcp --dport 443 -j ACCEPT
-A INPUT -i ens18 -p icmp -j ACCEPT
# allow incoming traffic to the outgoing connections,
# et al for clients from the private network
-A INPUT -m state --state RELATED,ESTABLISHED -j ACCEPT
# prohibit everything else incoming
-A INPUT -i ens18 -j DROP
COMMIT
# Completed on Fri Jun  5 16:45:02 2020
If you want, you can define the configuration for the IPv6 stack.
- If you want to restore iptables rules:
iptables-restore < /etc/iptables/rules.v4
- Configure /etc/hosts file. Example for controller-0 (need to replace
PUBLIC_GW_IP):
127.0.0.1       localhost
PUBLIC_GW_IP    gateway-01.external gateway-01

# The following lines are desirable for IPv6 capable hosts
::1     localhost ip6-localhost ip6-loopback
ff02::1 ip6-allnodes
ff02::2 ip6-allrouters

192.168.8.10    controller-0
192.168.8.11    controller-1
192.168.8.12    controller-2

192.168.8.20    worker-0
192.168.8.21    worker-1
192.168.8.22    worker-2
- To confirm the network configuration, reboot the VM and check the active IP addresses:
sudo reboot
Kubernetes nodes VM installation
The basic VM installation process is not the purpose of this tutorial. Because it's just a tutorial, the IPv6 stack is not configured, but you can configure it if you want.
These VM are used as Kubernetes node (controllers or workers).
The basic VM configuration process is the same of the 6 VM (you can also configure one, clone it and change IP address and hostname for each clone).
You have to:
-
Install the Ubuntu 18.04.4 LTS (Bionic Beaver) Server install image on this VM.
-
Configure the network interface (see the network architecture). Example of
/etc/netplan/00-installer-config.yamlfile if ens18 is the name of your private network interface (you need to change the IP address depending on the installed server):
# This is the network config written by 'subiquity'
network:
  ethernets:
    ens18:
      addresses:
      - 192.168.8.10/24
      gateway4: 192.168.8.1
      nameservers:
        addresses:
        - 9.9.9.9
  version: 2
If you want, you can define the configuration for the IPv6 stack.
- Define the VM hostname (example for controller-0):
hostnamectl set-hostname controller-0
- Update the packages list and update the system:
sudo apt-get update && sudo apt-get upgrade -y
- Install SSH and NTP:
sudo apt-get install ssh ntp -y
- Enable and start the SSH and NTP services:
sudo systemctl enable ntp
sudo systemctl start ntp
sudo systemctl enable ssh
sudo systemctl start ssh
- Configure /etc/hosts file. Example for controller-0 (need to replace
PUBLIC_GW_IPand adapt this sample config on each VM):
127.0.0.1 localhost
127.0.1.1 controller-0

# The following lines are desirable for IPv6 capable hosts
::1     ip6-localhost ip6-loopback
fe00::0 ip6-localnet
ff00::0 ip6-mcastprefix
ff02::1 ip6-allnodes
ff02::2 ip6-allrouters

PUBLIC_GW_IP    gateway-01.external
192.168.8.1     gateway-01

192.168.8.11    controller-1
192.168.8.12    controller-2

192.168.8.20    worker-0
192.168.8.21    worker-1
192.168.8.22    worker-2
- To confirm the network configuration, reboot the VM and check the active IP addresses:
sudo reboot
Running Commands in Parallel with tmux
tmux can be used to run commands on multiple compute instances at the same time. Labs in this tutorial may require running the same commands across multiple compute instances, in those cases consider using tmux and splitting a window into multiple panes with synchronize-panes enabled to speed up the provisioning process.
The use of tmux is optional and not required to complete this tutorial.
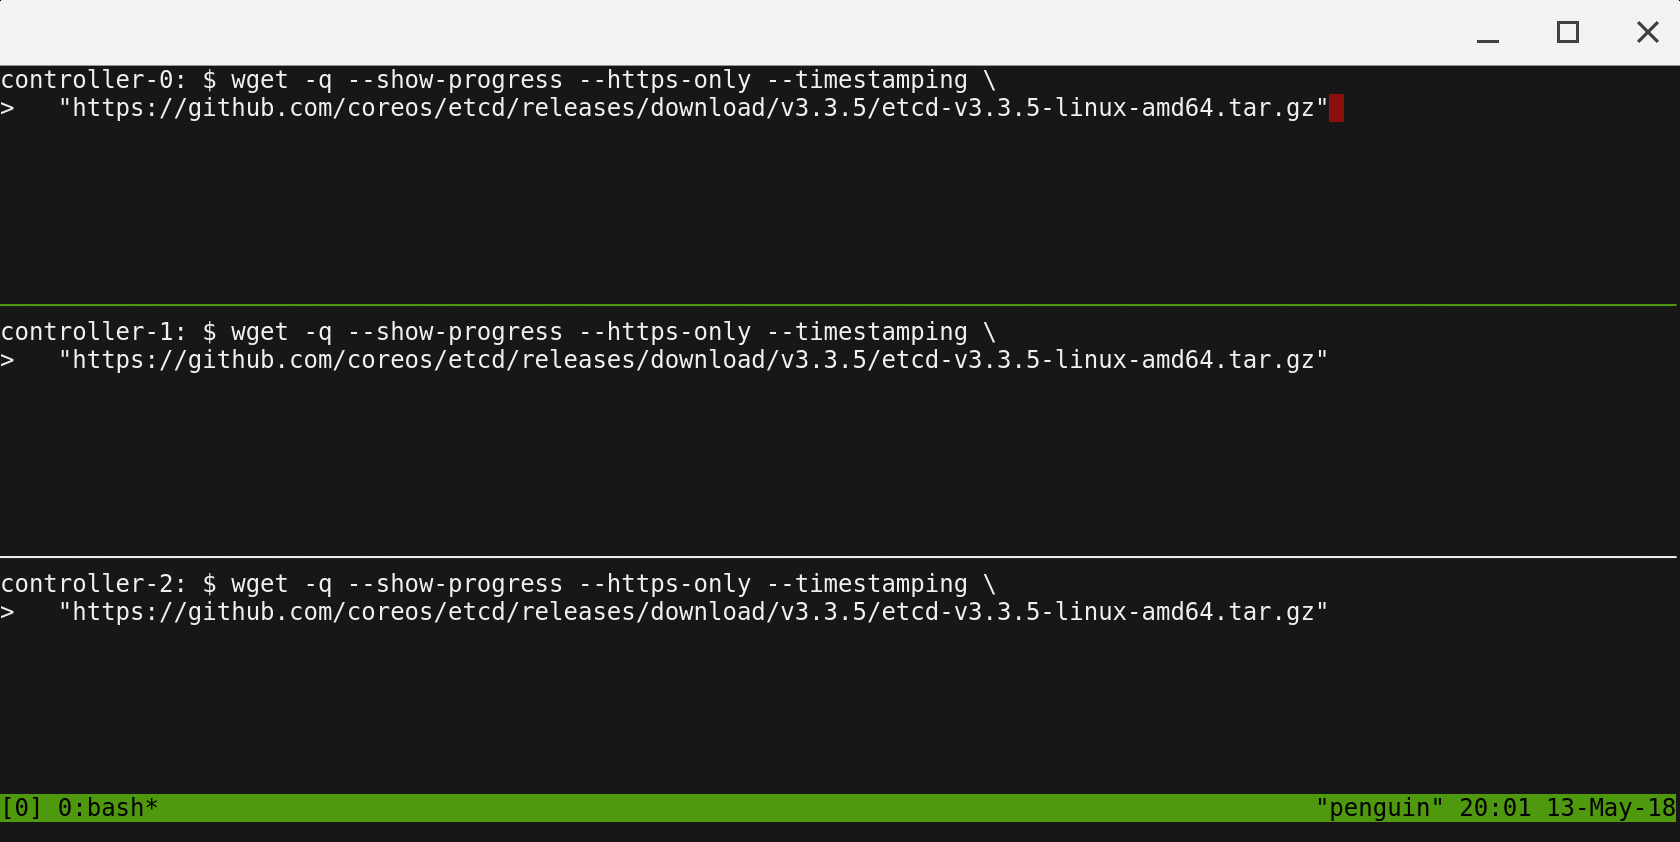
Enable synchronize-panes by pressing
ctrl+bfollowed byshift+:. Next typeset synchronize-panes onat the prompt. To disable synchronization:set synchronize-panes off.